
How to make a Geode Cake, step by step
 If you’re the craftsy kind of person who has a pinterest board full of creative and beautiful kitchen creations,
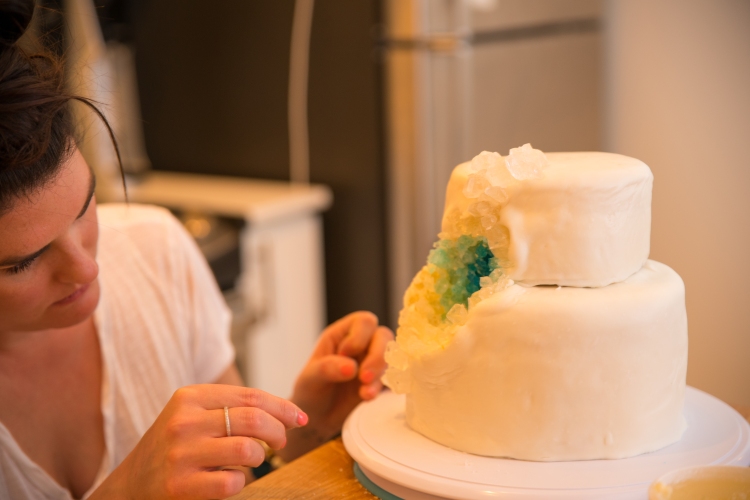
or you’re like me and are about to marry one of them, you’ve probably come across a few of these stars of social media, the Geode cakes. These beautiful cakes look like a sweet treat that’s been split apart to reveal a rock candy soul. Much like their namesakes reveal a crystal garden growing inside a regular looking rock. Today, we will kick off a four part series showing you step by step how to make your very own Geode Cake. Now, before we begin, I will caution you that this is a fairly involved project. So don’t go trying to tackle this on a bored rainy afternoon whim, plan to set aside a few hours on consecutive days. That being said, don’t be intimidated by this project. All the steps are fairly straightforward and simple, so take your time and have fun with it.
We will start by creating the fondant, which will provide the smooth outer shell for our cake. This particular fondant is marshmallow based, which is easier to make and still fairly workable although less forgiving than other rolled fondant varieties.
Step 1. Gather your goodies
We will be making two batches of fondant for this cake. You will want to make them separately, unless you’re mixing them in the bath tub, which I can’t say that I recommend. The ingredients listed below are for 1 batch.
- 1 Pound mini marshmallows
- 2 Pounds powdered sugar
- 1/4 cup of water, maybe a touch more
- 2 teaspoons clear vanilla extract
- Shortening for greasing up your hands and work surface
Step 2. You’re hot, sticky, sweet
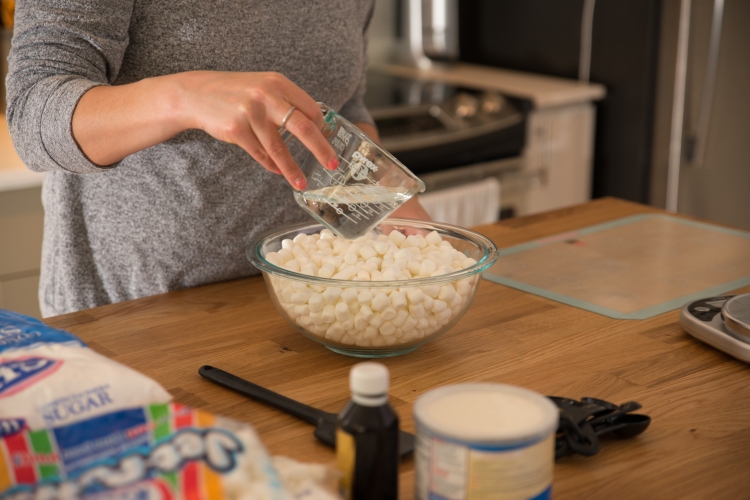
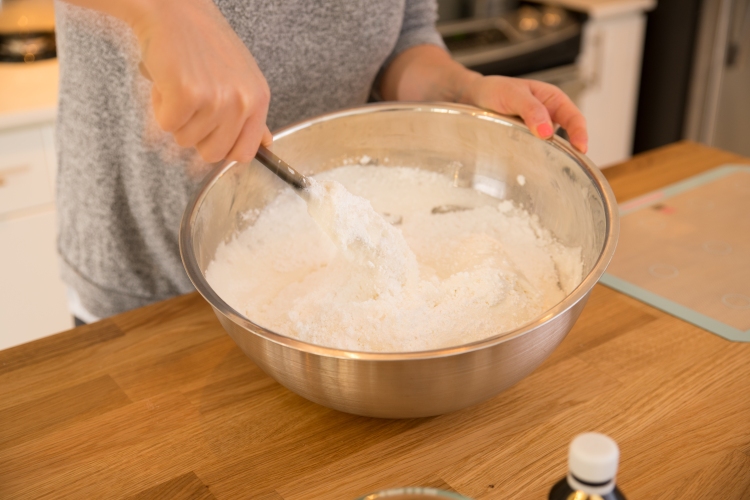
So, first we need to melt these mini marshmallows down to a usable goo. We do this by pouring a quarter of a cup of water over the top and sticking it in the microwave for 1 minute. This won’t be enough to fully melt the marshmallows, but we want to stop and stir the whole mess along the way and this is a good first stopping point. So, after we turn it over a few times, stick it back in for another 30 second spin and stir again. It should take a little over 2 minutes of time in the microwave total to get a warm hot sticky but smooth bowl of melted marshmallows, which is what we’re after.
Step 3. Color and flavor
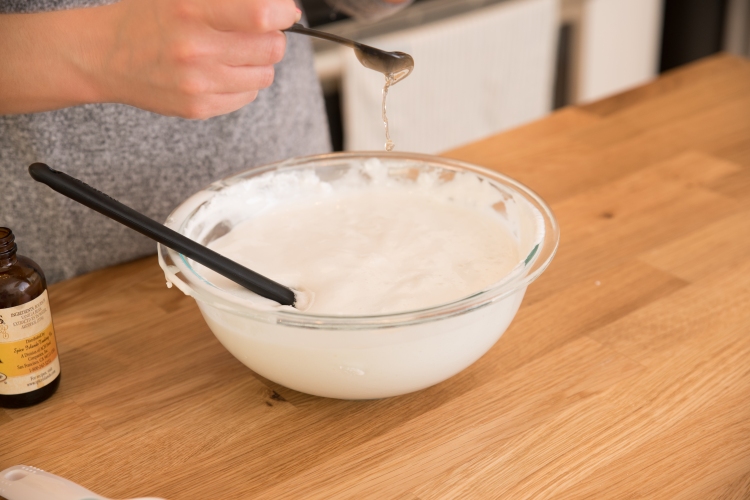
Now that we have the marshmallows melted but before we add the powdered sugar to firm it up is the ideal time to add in our coloring or flavoring agents. For this cake, we will be using a vanilla flavor, and a pure white color, so simply stir in the 2 teaspoons of clear vanilla extract and don’t worry about coloring.
Step 4. Behold the firming power of sugar
That title is really in the hopes of ruining someones google search for alternative diets. All we’re gonna do now is add our powdered sugar and knead this into the pliable dough that is fondant. 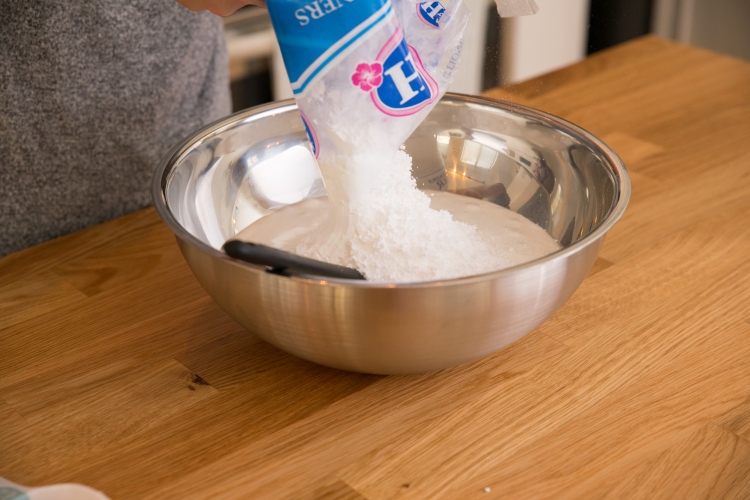
We simply dumped our powdered sugar in and went to work with the spatula, although this is where you can learn from our mistakes. We highly recommend sifting the sugar to get any little chunks out of it. In our batch, the little clumps didn’t mix well, and ended up forming little powdery pockets in the dough, not good. You then have to knead more, and the less we work the fondant, the better. So, easy to avoid this pitfall, simply sift the sugar in, all at once, and get to stirring.
Step 5. Work it out, Twerk it out
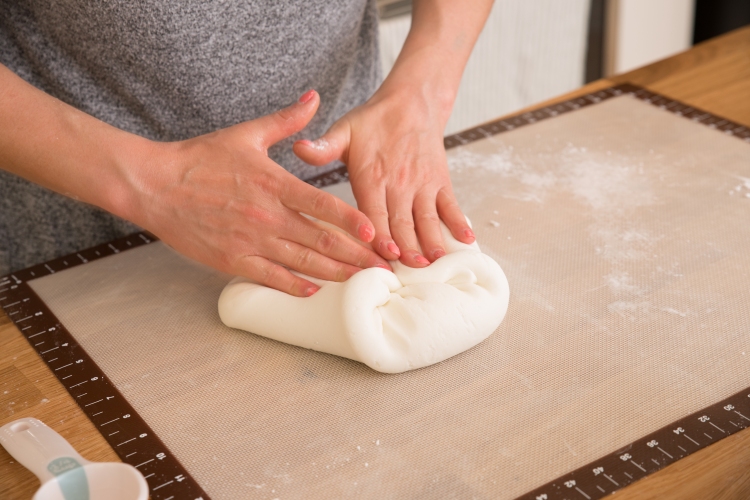
Once you’ve got the fondant sticking together and starting to form a dough in the bowl with a spatula, it’s time to get your hands dirty. At this point, you’ll want to liberally grease up your hands and work surface with the shortening to prevent the dough from sticking to you or your counter top. Pour the whole thing out and get in there, kneading just like a bread dough. The fondant should form a smooth dough with just a couple minutes of work. As we mentioned earlier, we don’t want to over work it, just enough to get it to come together a smooth dough.
Step 6. Whew, take a break
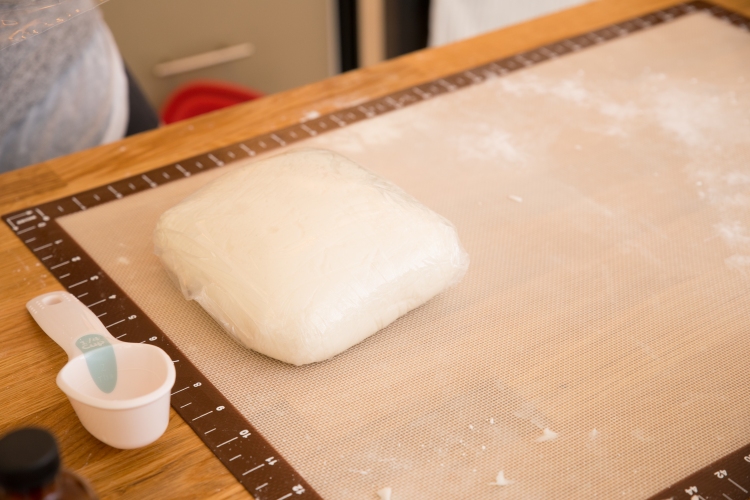
Now that we have our fondant, we need to let it rest for at least a day. Why? Theres an answer to that question, and I don’t have it. For now we will just say Magic… Or Science… your choice. The best way to keep our fondant while we wait for that magic to happen is to form a smooth ball of the dough, lightly grease it with the shortening and cover with a few layers of saran wrap. Then we can simply place our strangely narcotics looking bag of fondant in a large air tight container and set it on the counter, no refrigeration necessary!
Pat yourself on the back, by george, you’ve done it!
Tune in again soon, to see how we will make the rest of our cake and assemble it. Thanks for your interest!
